
Our raid advice tool helps you figure out which Pokemon to power up and spend stardust and candy on most effectively against specific raid bosses.
It shows you breakdowns of every single power-up and a graph to illustrate breakpoints. You can filter the graph with all the different results options.
Check out our tutorial to see how Pokebattler’s Ryan Barker should power up his Pokemon to beat Kyogre!
(Like the video? Subscribe to our YouTube channel!)
Using the Raid Advice Tool
Make sure you’ve logged into your Pokebox. You can only look at your own Pokemon you’ve entered into your Pokebox in our advice tool. After you’ve logged in, click on raids and then raid advice. Then you will need to fill out the box below:
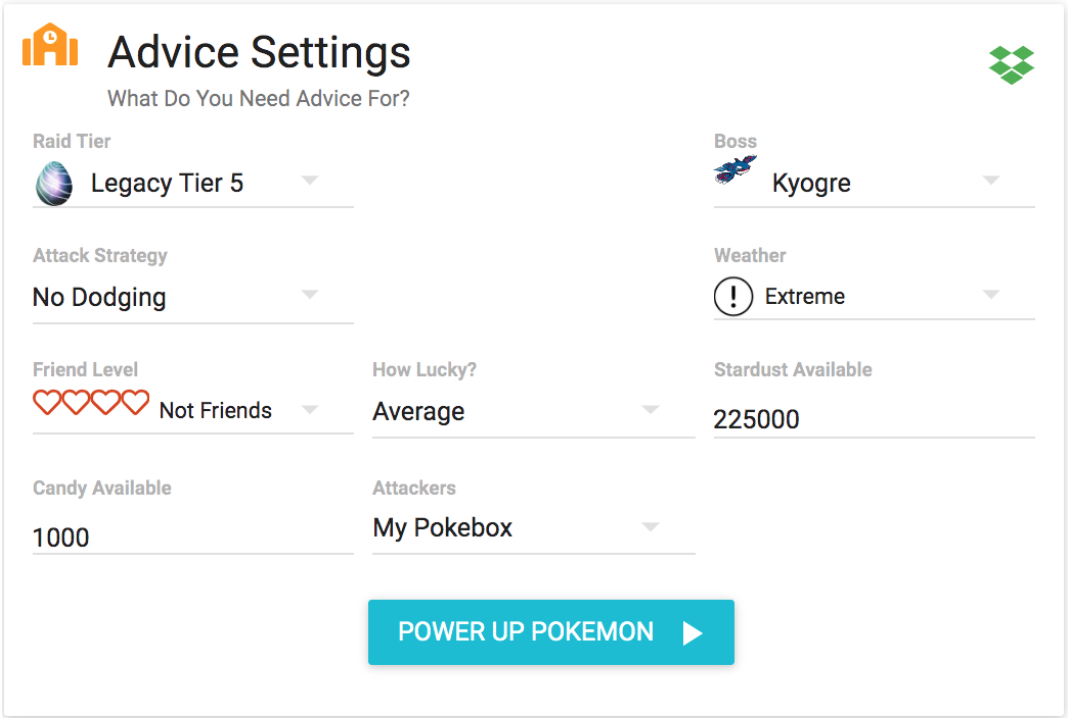
Filling out the Custom Raid Box
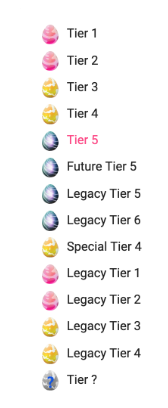
Tier
Click which tier your boss belongs in. ’ Legacy’ bosses are bosses not currently in raids but were available in the past.
Raid Boss
Based on what tier you choose, you’ll be given a choice of different raid bosses that are currently available (or previously available if you chose legacy). Choose the one you want from the menu.

Attack Strategies
These are options for your playing style. Most people use no dodging in raids where running out of time is an issue, and depending on bugs, the effectiveness of dodging can be iffy. But if you’re a great dodger, then choose one of the dodging options! Basically just choose the strategy closest to your playing style.
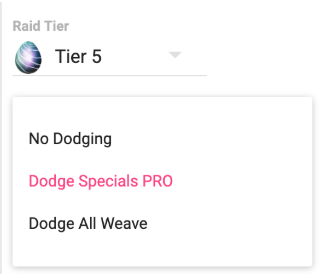
- No Dodging – Use your fast attacks as quickly as possible until you can unleash your charge attack
- Dodge Specials PRO – Use fast and charge moves as soon as you can, but dodge their charge attack.
- Dodge All Weave –This is the scaredy cat of pokebattler dodge simulations. Dodge All Weave will always assume the worst. It’ll always assume the move will come at the shortest possible delay — technically speaking it always assumes a “Defender Delay” of 1.5s. It wants to guarantee it can dodge the next attack. It is something that can be reproduced by real humans playing the game.
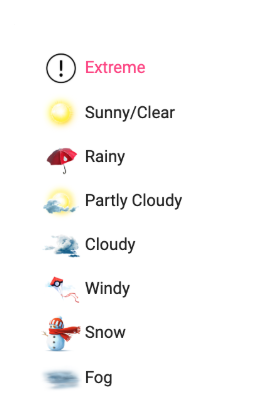
Weather
Select the weather for your raid. Remember ‘Extreme’ weather’ just means weather has no effect on the game. Weather can have a strong effect on different counters and bosses, so don’t forget this part!
Friend Level
If you’re raiding with friends, choose the friend level by choosing the different hearts. Friend level can have a strong effect on raid results, so don’t forget this part if you’re raiding with friends!

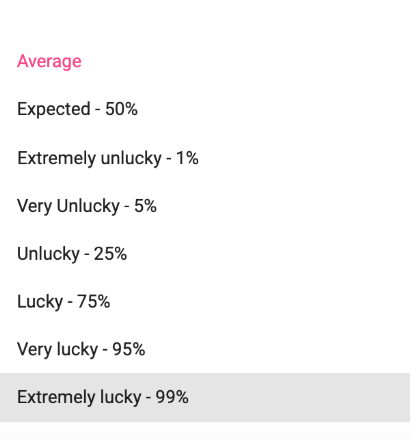
How Lucky
This will automatically be ‘average’ (the most accurate) if you don’t have at least a ‘Supporter’ Level subscription. If you do, you’ll get an array of choices for how ‘lucky’ you want your battle to be. Higher level subscriptions get more options. As all raids are random, there is a range of possible outcomes. Average luck gives you the middle result, not lucky or unlucky in terms of how well you do vs. how well the boss does against you. If you’re a supporter or higher and you choose a higher lucky percentile, like 75%, that means your result will be 25% luckier than average. Looking at the highest percentiles give you an idea of the very best performances you can hope for which is helpful for highly difficult solos or duos etc. where you want to know whether or not it’s impossible. But for most people just wanting to see the best counters and how they’ll do, average luck gives you the answer you’re looking for!
Stardust & Candy
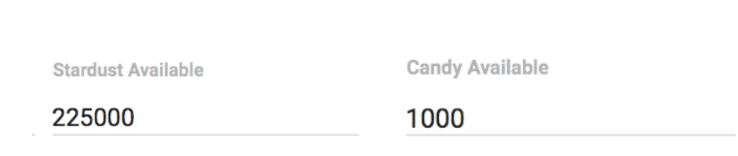
his is super important. The tool will go up to the maximum stardust and candy you have. You should put in as much max stardust you’re willing to use up, and as much of that boss’s candy plus any rare candy you’re willing to potentially spend to power up your Pokemon.
How it Works
This tool is designed to optimize your Pokemon against specific raid bosses. Once you filled everything out, click Power Up Pokemon. It will give you your results, like so:
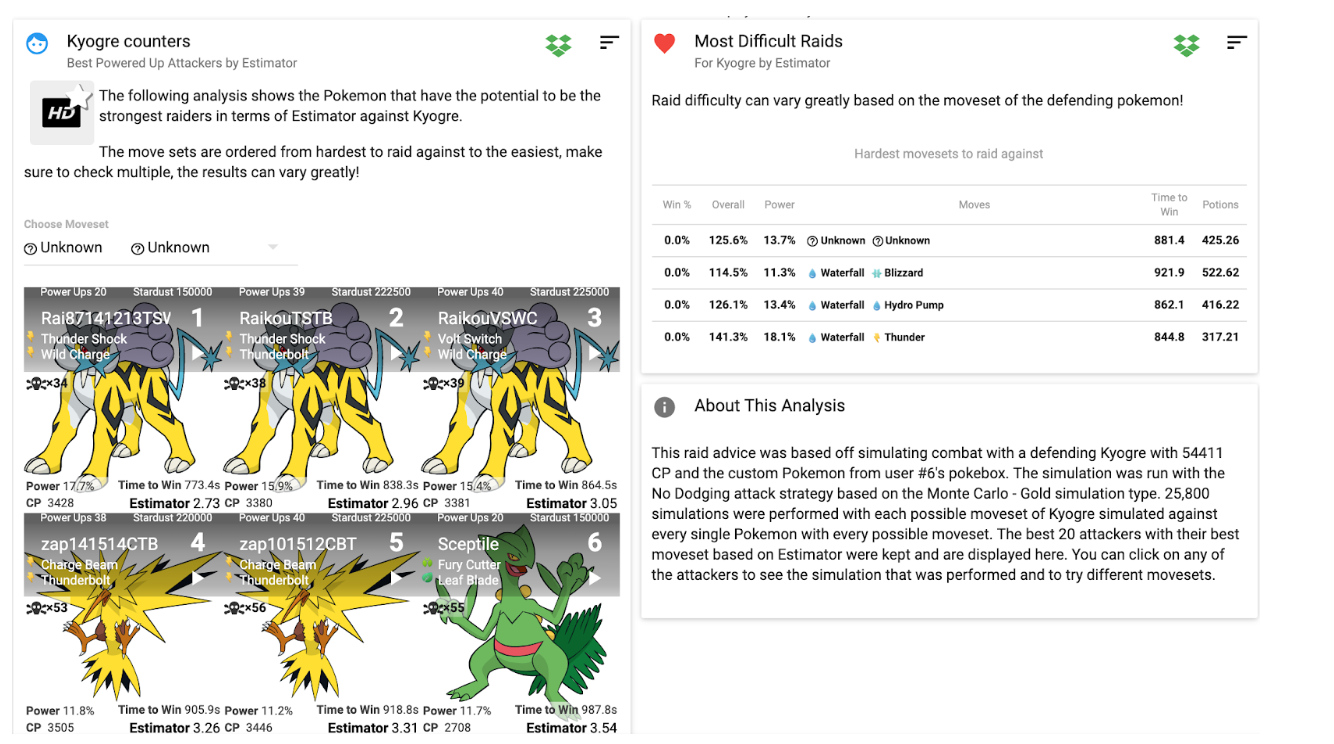
This is your potential dream team against your chosen raid boss. Now our tool applies up to the maximum allowed stardust and candy to every possible Pokemon in your Pokebox. So you won’t be able to power up every single one like it suggests. This is just showing the potential of each one and illustrates how your best lineup against certain bosses would change once you apply stardust. You may want to compare them side by side with your normal line up by opening a second window like I did in my tutorial video above.
To really get an idea of how to power up your Pokemon the best, you need to click on them. Then you will get a series of different stats and info like the following:
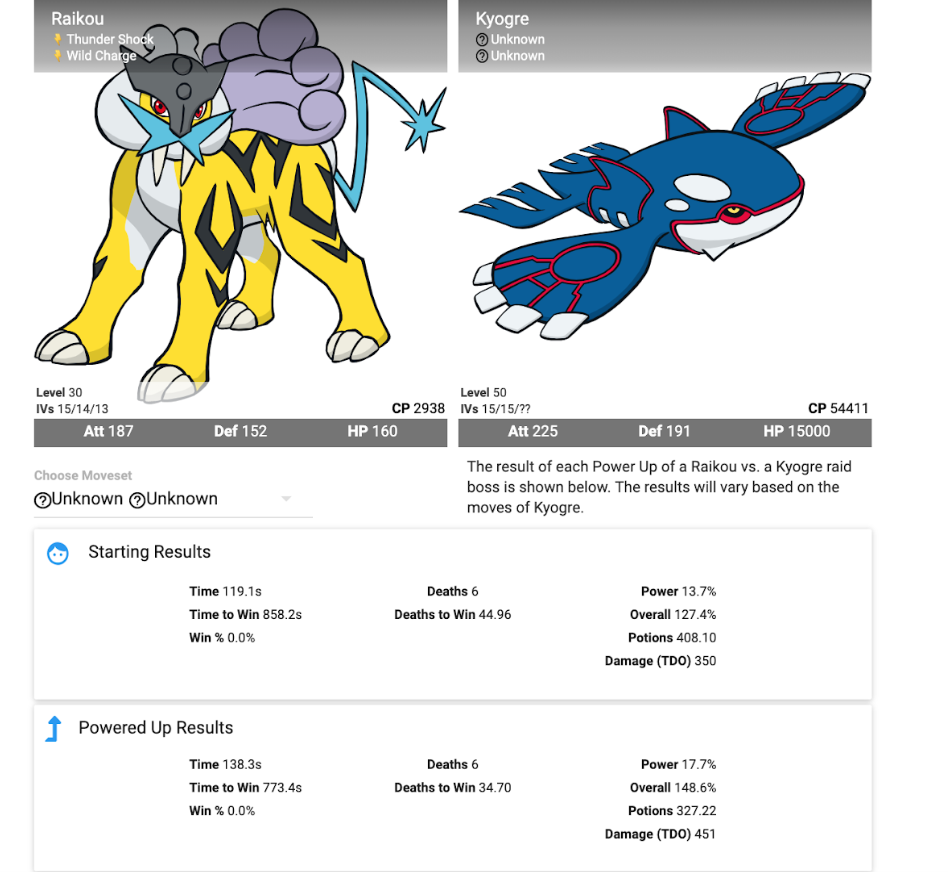
This shows you how that individual Pokemon does before and after power ups. The top, labeled Starting Results, is how it is now, from your Pokebox, and the bottom box, labeled Powered up Results, shows how the Pokemon will do if you do the maximum suggested powerups (spending all your stardust and candy).
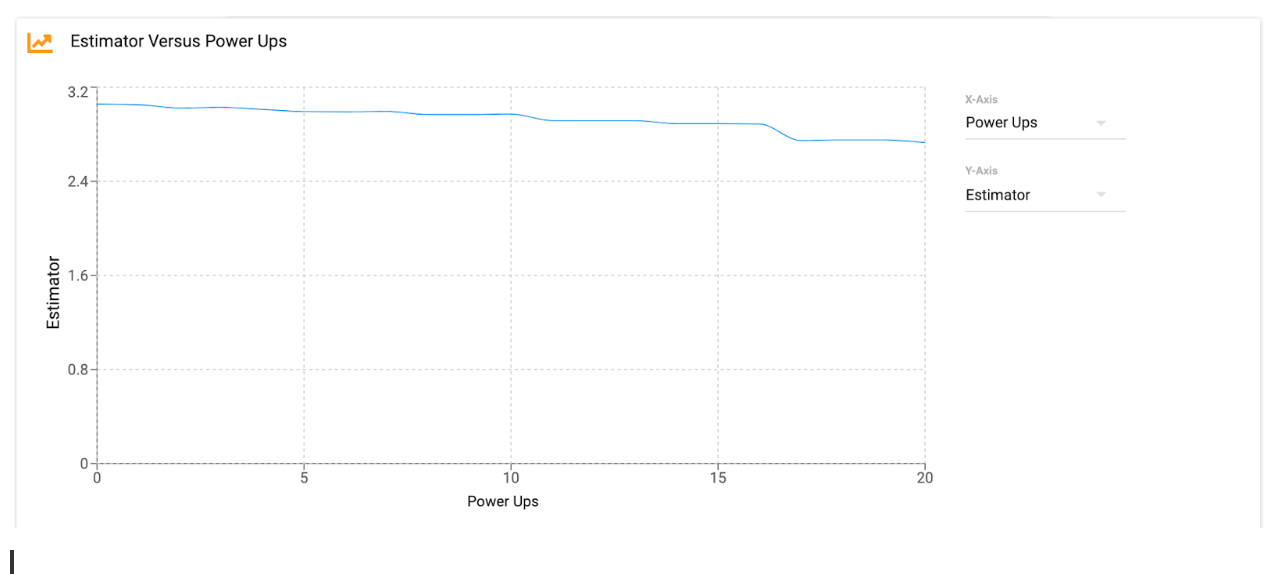
The next thing you’ll see are graphs showing the different sort results. It automatically sorts by Estimator and Power Ups, but as is the Pokebattler way, there are a bunch of different custom sort options.
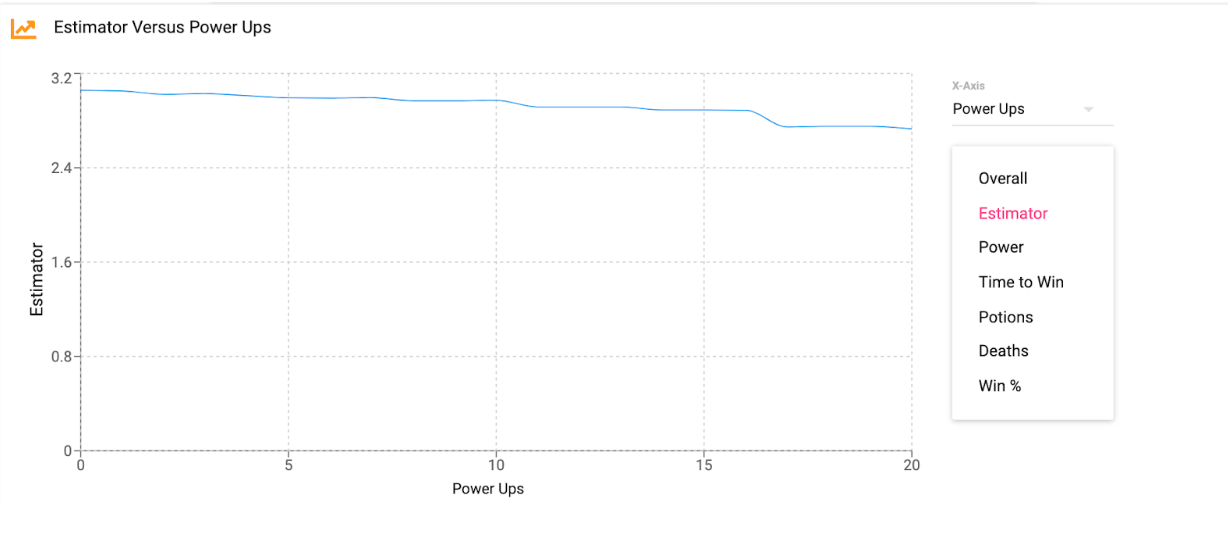
You can sort by Overall, Estimator, Power, Time to Win, Potions, Deaths and Win %.
he graph allows you to look for breakpoints which are big jumps in effectiveness after certain powerups. Some power-ups don’t make much of a difference. You want to try to power-up your Pokemon to hit certain breakpoints to get the most out of your stardust. See that big drop that happens at power-up 17? That’s a breakpoint! You can see how all the stats break down on the results list below. But before you scroll down, play around with the graph sort results.
How Sort Options are Calculated
Overall
This is something you can sort by, and also automatically shows up on each counter window at the bottom. This rating weights various components differently based on empirical analysis of many different situations. In general, the formulas are weighted such that you should win the battle and in the case of raids, get 2 or 3 bonus balls without rejoining. Here are the equations.
- Tier 1 Raids – 25% Power, 75% Time to Win. Time to Win goal is 120 seconds.
- Tier 2 Raids – 25% Power, 75% Time to Win. Time to Win goal is 180 seconds.
- Tier 3 Raids – 25% Power, 75% Time to Win. Time to Win goal is 180×2 seconds. Power goal is 50%.
- Tier 4 Raids – 33.3% Power, 66.7% Time to Win. Time to Win goal is 180×3 seconds. Power goal is 33.3%.
- Tier 5 Raids – 33.3% Power, 66.7% Time to Win. Time to Win goal is 300×5 seconds. Power goal is 20%.
Estimator
Estimator is the easy way to see how many players it would take with this level of Pokémon. Technically it is similar to the time to win including rejoin time divided by the time available for the boss. Behind the scenes the math assumes that each player does as much damage as possible within the 180 or 300 seconds. It then divides the boss health by this damage done to give a realistic number of players required.
Power
This is an option to sort by, and also shows up automatically on each counter window. Power is the percentage of damage done to a raid boss’s health by 6 of that exact Pokemon in a row within the number of seconds possible for that raid (300 seconds for tier 5, 180 seconds for tier 4, etc.) So if power is at 25%, that means after six of that one Pokemon attack that boss and die, that boss will have 75% of its health left. If power is over 100%, that means that boss has died at least once. For example, if power is 250%, that boss has died 2 and a half times during the time 6 of that one Pokemon attack, within the raid time limit.
Time to Win
This is the amount of time it takes one Pokemon, cloned 6 times in a raid, fighting, dying, then being reborn until it defeats the raid boss. So if a Rhydon takes 1003.5 seconds to beat a Raikou, that means your infinite number of 6 groups of Rhydon took a total of 1003.5 seconds. If you look at the combat time, that’s how long it takes until all 6 Rhydon die. So here we see they only last 243 seconds, they die before the 300-second mark.
Potions
This tells you how much it takes to revive the health of your Pokemon after going after a raid boss. We use a basic, 20 HP potion as a baseline potion. Revives always heal half your health. We represent a revive as 5 potions (reason: because we say so). This is the actual equation used:
Deaths (5 + attacker HP/2/20) + last attacker damage taken/20 = Result. Remember that 5 we’re adding is the revive. So if a boss needs 50 potions, remember that 5 of that, multiplied by total number of deaths, is how many revives you’ll use. If 4 Pokemon die during the raid, then subtract 20 from your total needed potion count. And of course most people are using stronger potions to revive their Pokemon, but we only use basic potions for our stat. It still allows you to compare which Pokemon will need more potions.
Deaths
This is the number of times the Pokémon would faint before doing enough damage to defeat the boss.
Win %
Rejoining will often help you win when there is time even if the win percentage is low. This is just looking at what happens if that counter, 6 times, plus additional trainers, all play through once without rejoining.
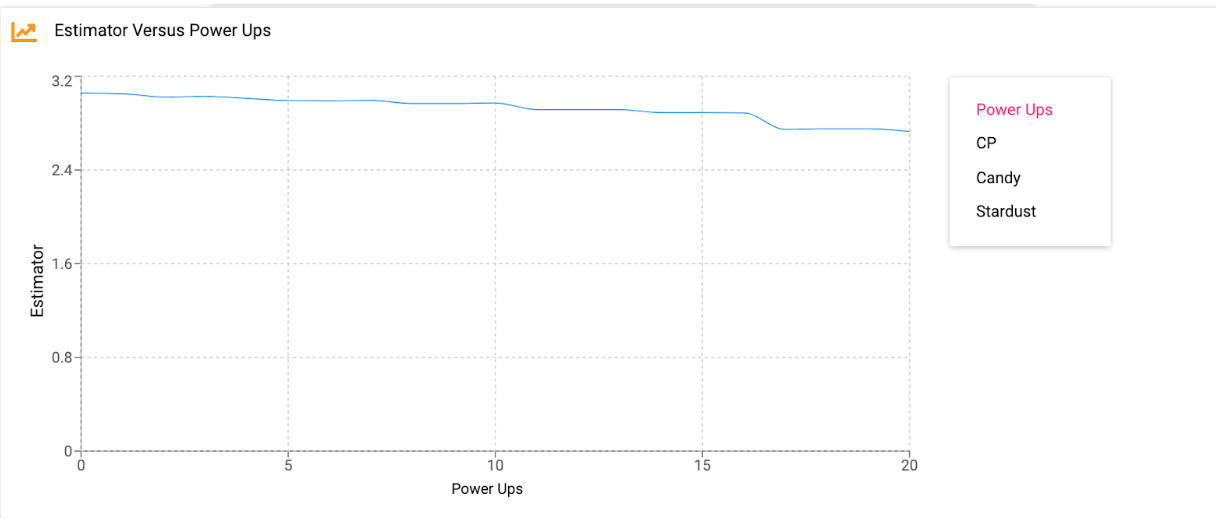
Win % is most useful for close solo scenarios where you will not always win. For tier 3 and below it can help you know if a particular fight is sometimes beatable with that Pokémon. The x-axis lets you explore power-ups, CP, candy, and stardust separately.
Detailed Results for Each Power Up
The next result is a table with the results of each individual power up and how much everything costs. If you can afford up to 5 power ups based on your candy and stardust,, it will show those. If you have up to 20, it will show all 20.
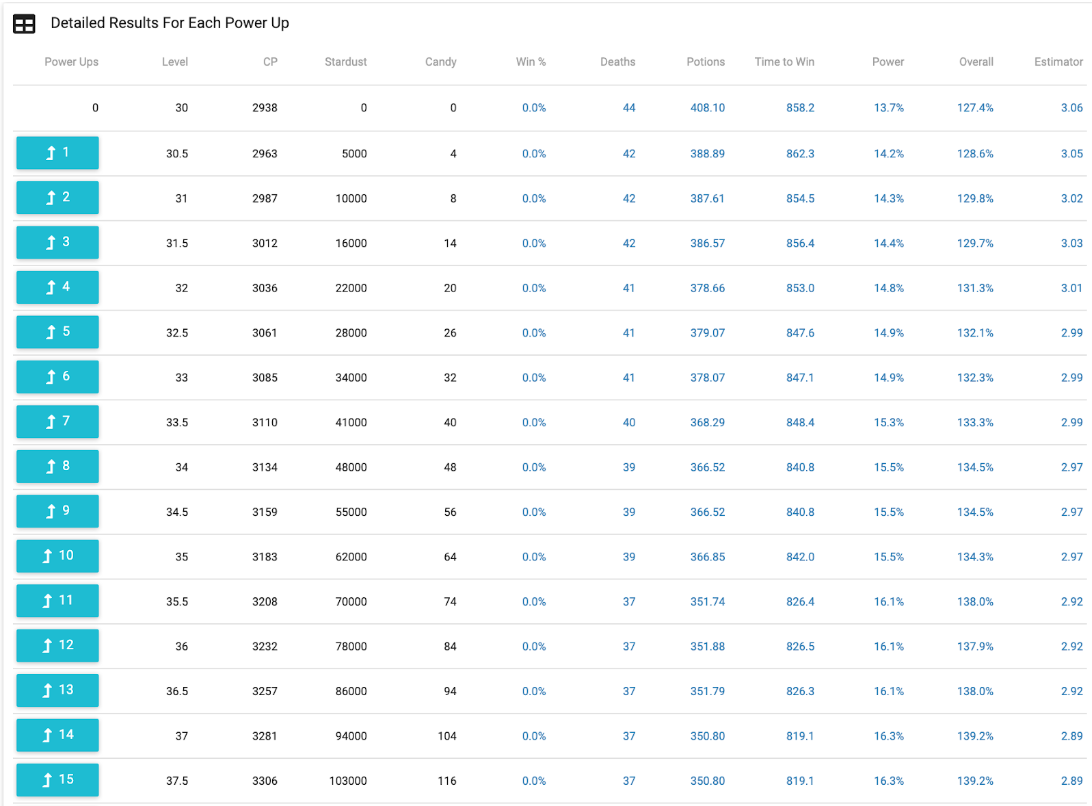
You can also see the breakpoints here. See how this Raikou jumps up from 13.7% power to 14.2% power with one power up at power up 1? Then at power up 2, he only goes up to 14.3%! That’s why we made this tool, to help you see how much more, or less, efficient different power-ups are.
We hope this tool helps you optimize your raid parties. Happy hunting!
Recent Comments